Well, I must confess — I absolutely despise building forms in React Native. It’s not the UI part, mind you. Styling a TextInput is fine. But the logic? Ugh, it’s a nightmare. Managing state for a dozen fields, handling focus, dealing with the keyboard popping up and covering the submit button, and, worst of all, validation. Don’t even get me started.
If you’ve ever tried to write custom validation logic for a sign-up flow with email regex, password complexity rules, and “confirm password” matching using just useState and a bunch of if statements, you know the pain. It’s a mess of spaghetti code that breaks the moment you add a new requirement.
Well, I stopped doing that years ago. For a long time, my go-to stack has been Formik for the state management and Yup for the schema validation. And you know what? Even now in 2026, with newer contenders floating around, this combination remains incredibly reliable for complex React Native apps.
Why I Still Stick With This Combo
Okay, let’s be honest here. I tried switching to a few “lighter” libraries last year. And, well, one of them caused a memory leak on an older Android device I use for testing (a battered Pixel 4a that refuses to die). I went back to Formik because it just works. It handles the “touched” state — you know, knowing if a user has actually interacted with a field before shouting at them — better than anything else I’ve used.
And Yup? It reads like English. That matters when I’m debugging a validation error at 11 PM on a Tuesday and my brain is running on fumes. As the Yup documentation states, “Yup is a schema validation library that allows you to define complex object schemas with a readable, declarative API.”
The Setup

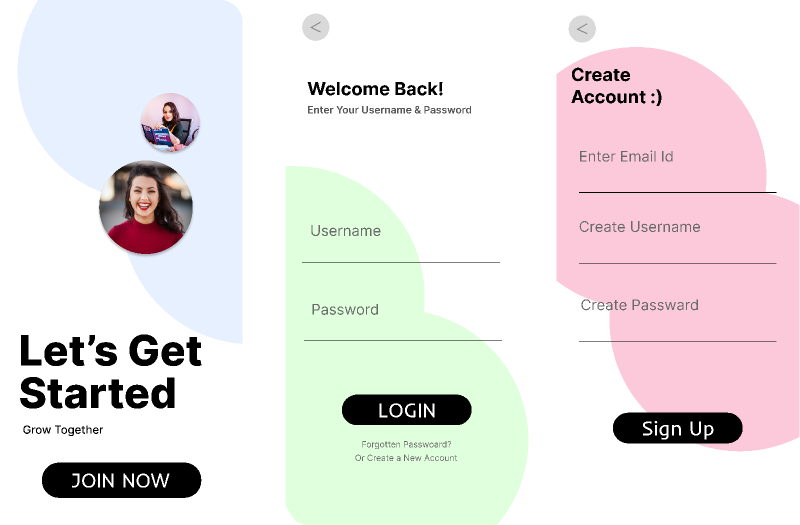
Alright, let’s look at a real scenario. I was building a profile update screen recently. It needed a username, email, and a bio. The bio had a max length, the email had to be valid, and the username had to be at least 3 characters.
npm install formik yupStep 1: Define the Rules First
I always write the schema before I touch a single UI component. It forces you to think about the data structure. Here is the schema I used for that profile screen:
import * as Yup from 'yup';

const ProfileSchema = Yup.object().shape({
  username: Yup.string()
    .min(3, 'Too short! Needs 3+ chars.')
    .max(20, 'Okay, easy there, 20 chars max.')
    .required('We need a name.'),
  email: Yup.string()
    .email('That doesn\'t look like an email.')
    .required('Email is required.'),
  bio: Yup.string()
    .max(150, 'Keep it punchy (150 chars max).'),
});
Step 2: The Component Implementation
import React from 'react';
import { View, Text, TextInput, Button, StyleSheet } from 'react-native';
import { Formik } from 'formik';

export const ProfileForm = () => {
  return (
    <Formik
      initialValues={{ username: '', email: '', bio: '' }}
      validationSchema={ProfileSchema}
      onSubmit={(values) => {
        console.log('Sending to API:', values);
        // API call goes here
      }}
    >
      {({ handleChange, handleBlur, handleSubmit, values, errors, touched }) => (
        <View style={styles.container}>

          <View style={styles.fieldContainer}>
            <Text style={styles.label}>Username</Text>
            <TextInput
              style={styles.input}
              onChangeText={handleChange('username')}
              onBlur={handleBlur('username')}
              value={values.username}
              placeholder="jdoe123"
            />
            {touched.username && errors.username && (
              <Text style={styles.errorText}>{errors.username}</Text>
            )}
          </View>

          <Button onPress={handleSubmit} title="Update Profile" />
        </View>
      )}
    </Formik>
  );
};
The “Touched” State Trap
But wait, there’s more. Notice that condition: touched.username && errors.username. This is critical. If you leave out the touched check, your form will scream at the user the second the screen loads because the required fields are empty.
A Real-World Gotcha: Performance on Low-End Android
And here’s something the documentation rarely mentions. By default, Formik validates on every keystroke (validateOnChange={true}). On a high-end iPhone 16, you won’t notice a thing. But I ran into a serious issue last month testing on a low-end Android device with a complex form (about 20 fields).
The Fix: I switched the validation strategy. I set validateOnChange={false} and kept validateOnBlur={true}. This means validation only runs when the user finishes typing and leaves the field (or hits submit). The input lag vanished instantly. The Formik documentation covers these validation options in detail.
Async Validation (The Username Check)
Another thing that trips people up is checking if a username is taken. You can’t just slap an async function into Yup’s test method without being careful, or you’ll hammer your API with 50 requests a second.
I handle this by debouncing the validation, but honestly? I usually move server-side validation to the onSubmit handler instead of the schema. It’s cleaner. Let Yup handle the format (is it a string? is it long enough?) and let the server handle the “business” logic (is it taken?) when they hit submit.
Final Thoughts
There are other libraries out there. React Hook Form is great and technically more performant because it avoids re-renders by using uncontrolled inputs. But Formik’s explicit state model fits my mental model better when I need to debug why a specific field isn’t updating.
Sometimes the “best” tool isn’t the fastest one — it’s the one that stops you from throwing your laptop out the window when the requirements change five minutes before launch.
Frequently asked questions
Why is Formik still a good choice for React Native forms in 2026?
Formik remains reliable because it handles the ‘touched’ state better than lighter alternatives, letting you know if a user has interacted with a field before showing errors. The author tried switching to newer lightweight libraries, but one caused a memory leak on an older Android device. Paired with Yup’s readable, declarative schema API, the combo stays easy to debug even late at night when requirements change unexpectedly.
How do I fix Formik input lag on low-end Android devices?
By default, Formik runs validation on every keystroke via validateOnChange={true}, which causes noticeable lag on low-end Android devices with complex forms of around 20 fields. The fix is to set validateOnChange={false} and keep validateOnBlur={true}, so validation only runs when the user leaves a field or hits submit. The author reports input lag vanished instantly after switching strategies.
Why should I check touched before showing Formik validation errors?
Using the condition touched.username && errors.username is critical because without the touched check, the form will display error messages the second the screen loads, since required fields start empty. The touched state tracks whether the user has actually interacted with a field, so errors only appear after they’ve tried entering something or moved past it, preventing an aggressive first impression.
How should I validate if a username is already taken with Formik and Yup?
Avoid dropping an async function directly into Yup’s test method, or you’ll hammer your API with up to 50 requests per second. The author recommends debouncing validation or, more cleanly, moving server-side checks to the onSubmit handler. Let Yup handle format rules like string type and length, and let the server handle business logic like uniqueness when the user actually submits the form.