Introduction
In the fast-paced world of mobile app development, speed and quality are paramount. The React Native ecosystem offers a wealth of tools to build cross-platform applications, but creating a beautiful, consistent, and accessible user interface from scratch can be a significant bottleneck. This is where UI component libraries come into play, and NativeBase has established itself as a frontrunner, offering a rich suite of accessible and highly customizable components. However, a great UI library is only one piece of the puzzle. To truly accelerate development, developers are increasingly turning to robust application boilerplates that provide a solid architectural foundation. By combining a powerful UI toolkit like NativeBase with a comprehensive boilerplate, development teams can skip the tedious setup and focus on what truly matters: building unique features. This article provides a deep dive into leveraging Native-Base within a modern React Native workflow, exploring core concepts, practical integration steps, advanced theming, and best practices to help you build high-quality applications faster than ever before. This synergy is a hot topic in recent React Native News, reflecting a broader trend towards more efficient and scalable development practices.
Section 1: The Core Synergy: UI Libraries and Application Architecture
At the heart of this powerful development strategy lies the combination of two specialized tools: a UI component library for the “front of the front-end” and a boilerplate for the application’s underlying structure. Understanding their individual roles and how they complement each other is key to unlocking maximum efficiency.
What is NativeBase?
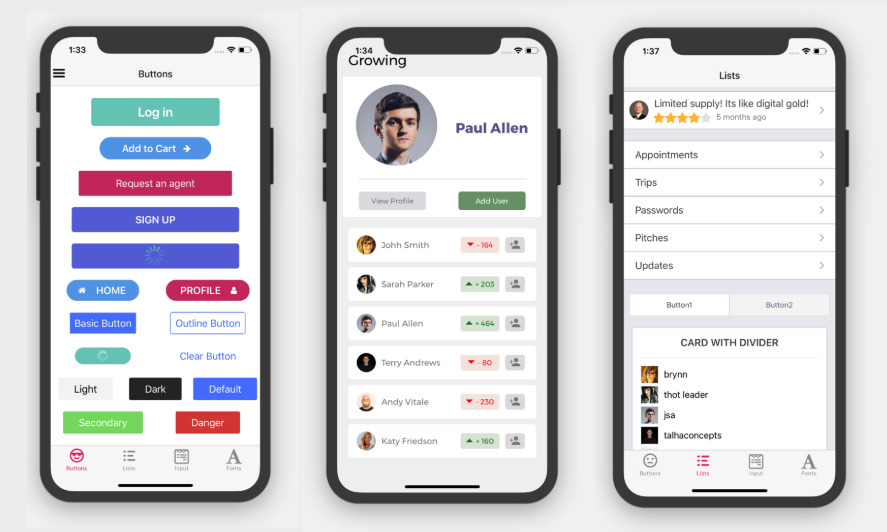
NativeBase is a universal component library for React Native that enables developers to build consistent UIs across Android, iOS, and the web. Its primary value proposition is its utility-first approach, heavily inspired by Tailwind CSS. Instead of writing custom stylesheet objects, you apply styling directly through props. This dramatically speeds up the styling process and improves code readability. Key features include:
- Utility-First Props: Apply styles like margin, padding, color, and flexbox properties directly on components (e.g.,
<Box bg="primary.500" p="4">). - Comprehensive Component Set: From basic building blocks like
BoxandTextto complex components likeModal,Select, andAvatar. - Advanced Theming: A powerful and extensible theming system allows for deep customization of colors, fonts, spacing, and component variants to match any brand identity.
- Accessibility by Default: Components are built with accessibility in mind, following WAI-ARIA standards to ensure your app is usable by everyone.
While other libraries like React Native Paper News and Tamagui News are making waves, NativeBase’s mature ecosystem and utility-first philosophy offer a unique and compelling developer experience. Here’s a quick look at its syntax:
import React from 'react';
import { NativeBaseProvider, Box, Heading, Text, Button, VStack } from 'native-base';

export const FeatureCard = () => {
  return (
    <Box
      bg="white"
      p="6"
      rounded="xl"
      shadow={3}
      _dark={{ bg: 'gray.700' }}
    >
      <VStack space={4}>
        <Heading size="md">Explore New Features</Heading>
        <Text color="gray.500" _dark={{ color: 'gray.300' }}>
          Discover all the latest updates and improvements in our new release.
        </Text>
        <Button colorScheme="primary" alignSelf="flex-start">
          Learn More
        </Button>
      </VStack>
    </Box>
  );
};

// To use this component, you would wrap your app in NativeBaseProvider
// export default () => <NativeBaseProvider><FeatureCard /></NativeBaseProvider>;
Why Use a Boilerplate like Ignite?
A boilerplate provides a pre-configured, opinionated starting point for a new application. While you can build everything from the ground up, a good boilerplate saves hundreds of hours by providing a production-ready setup for navigation, state management, API integration, testing, and more. Ignite, by Infinite Red, is one of the most popular boilerplates in the React Native community. It comes packed with:
- Solid Architecture: A well-organized folder structure that scales.
- State Management: Pre-configured with MobX-State-Tree, a powerful and observable state management solution. This is a key differentiator in MobX News versus the more common Redux News or Zustand News updates.
- Navigation: React Navigation News is always evolving, and Ignite comes with a fully set-up navigation stack.
- Testing: Jest News and React Testing Library News are standard, with configurations ready for unit and component testing.
- CLI Generators: A command-line interface to quickly scaffold new components, screens, and models.
By using Ignite, you inherit a set of best practices and a robust foundation, allowing your team to focus on building features instead of debating architectural decisions.
Section 2: Practical Implementation: Integrating NativeBase into an Ignite Project
Let’s walk through the practical steps of combining these two powerful tools. The process is straightforward and sets the stage for rapid development.
Step 1: Initialize Your Ignite Project
First, ensure you have the Ignite CLI installed. Then, spin up a new project. Ignite will ask you a few questions and then generate a complete project structure.
# Install the Ignite CLI
npm i -g ignite-cli

# Create a new React Native project using the Ignite boilerplate
ignite new MyAwesomeApp

# Navigate into your new project directory
cd MyAwesomeApp
Step 2: Install NativeBase and Dependencies
Next, add NativeBase and its peer dependencies to your project. NativeBase relies on `react-native-svg` for some of its components and `react-native-safe-area-context` for handling device notches and safe areas.
# Using npm
npm install native-base react-native-svg react-native-safe-area-context

# Or using Yarn
yarn add native-base react-native-svg react-native-safe-area-context

# For iOS, you need to install the pods
cd ios && pod install
Step 3: Wrap Your Application with `NativeBaseProvider`
For NativeBase’s theme and utility props to work, your entire application must be wrapped in the `NativeBaseProvider` component. In a standard Ignite project, the best place to do this is in the `app/app.tsx` file, which serves as the root of your application.
// In app/app.tsx

import { NativeBaseProvider } from "native-base"
import React from "react"
import { initialWindowMetrics, SafeAreaProvider } from "react-native-safe-area-context"
import { useInitialRootStore } from "./models"
import { AppNavigator, useNavigationPersistence } from "./navigators"
import { ErrorBoundary } from "./screens/ErrorScreen/ErrorBoundary"
import * as storage from "./utils/storage"

export const NAVIGATION_PERSISTENCE_KEY = "NAVIGATION_STATE"

function App() {
  const {
    initialNavigationState,
    onNavigationStateChange,
    isRestored: isNavigationStateRestored,
  } = useNavigationPersistence(storage, NAVIGATION_PERSISTENCE_KEY)

  const { rehydrated } = useInitialRootStore(() => {
    // This runs after the root store has been initialized and rehydrated.
  })

  if (!isNavigationStateRestored || !rehydrated) return null

  return (
    <SafeAreaProvider initialMetrics={initialWindowMetrics}>
      <ErrorBoundary catchErrors={"always"}>
        <NativeBaseProvider>
          <AppNavigator
            initialState={initialNavigationState}
            onStateChange={onNavigationStateChange}
          />
        </NativeBaseProvider>
      </ErrorBoundary>
    </SafeAreaProvider>
  )
}

export default App
By wrapping `AppNavigator` with `NativeBaseProvider`, you make the theme context available to all screens and components within your navigation stack.
Section 3: Advanced Techniques: Theming and Composable Components
Once the basic setup is complete, you can unlock the true power of NativeBase through its advanced theming capabilities and by creating your own reusable components. This is how you build a scalable and maintainable design system for your application.
Customizing the Theme
NativeBase allows you to extend its default theme to define your brand’s specific design language. You can customize colors, fonts, spacing, and even the default styles of components. A common practice is to create a dedicated theme file.
Create a file, for example, at `app/theme/theme.ts`:
// In app/theme/theme.ts
import { extendTheme } from 'native-base';

export const customTheme = extendTheme({
  colors: {
    // Add new color palettes
    primary: {
      50: '#E3F2F9',
      100: '#C5E4F3',
      200: '#A2D4EC',
      300: '#7AC1E4',
      400: '#47A9DA',
      500: '#0088CC',
      600: '#007AB8',
      700: '#006BA1',
      800: '#005885',
      900: '#003F5E',
    },
    secondary: {
      500: '#FFC107',
    },
  },
  config: {
    // Changing initial color mode
    initialColorMode: 'light',
  },
  components: {
    // Override default component styles
    Button: {
      baseStyle: {
        rounded: 'md', // Make all buttons have medium rounded corners by default
      },
      defaultProps: {
        colorScheme: 'primary', // Set the default color scheme for all buttons
      },
    },
    Heading: {
      baseStyle: ({ colorMode }) => {
        return {
          color: colorMode === 'dark' ? 'primary.300' : 'primary.800',
          fontWeight: 'bold',
        };
      },
    },
  },
});
Then, you pass this custom theme to the `NativeBaseProvider` in `app/app.tsx`:
<NativeBaseProvider theme={customTheme}>...</NativeBaseProvider>
Building Composable Components
The real magic happens when you start building your own library of reusable components on top of NativeBase. This enforces consistency and abstracts away implementation details. For example, instead of styling a “primary action button” every time, you can create a `PrimaryButton` component.
// In app/components/PrimaryButton.tsx
import React from 'react';
import { Button, IButtonProps, Spinner, Text } from 'native-base';

interface PrimaryButtonProps extends IButtonProps {
  tx?: string; // For i18n text
  text?: string;
  isLoading?: boolean;
}

export const PrimaryButton = ({ tx, text, isLoading, ...rest }: PrimaryButtonProps) => {
  const content = text || (tx ? "Translate Me!" : ""); // Replace with your i18n logic

  return (
    <Button
      size="lg"
      variant="solid"
      colorScheme="primary"
      isLoading={isLoading}
      spinner={<Spinner color="white" />}
      _loading={{
        bg: 'primary.400',
        _text: {
          color: 'white',
        },
      }}
      _pressed={{
        bg: 'primary.600',
      }}
      {...rest}
    >
      <Text color="white" fontWeight="bold">
        {content}
      </Text>
    </Button>
  );
};
Now, anywhere in your app, you can use <PrimaryButton text="Sign Up" /> and it will always be perfectly styled according to your design system. This pattern is excellent for tools like Storybook News, where you can document and visualize your entire component library in isolation.
Section 4: Best Practices and Optimization
While this combination is powerful, following best practices ensures your application remains performant, accessible, and maintainable as it grows.
Performance Considerations
A common concern with utility-first libraries is performance. Does creating new style objects for every prop slow things down? NativeBase is highly optimized. It intelligently caches and flattens styles, converting utility props into optimized `StyleSheet.create` objects under the hood. To maintain performance:

- Avoid Excessive Nesting: Deeply nested
Boxcomponents can add overhead. Use layout components likeVStack,HStack, andZStackto create layouts with a flatter hierarchy. - Use `FlatList` for Long Lists: For rendering long lists of data, always use React Native’s `FlatList` or NativeBase’s `FlatList` component instead of mapping over an array inside a `ScrollView`.
- Memoize Components: For complex components that don’t re-render often, use `React.memo` to prevent unnecessary render cycles.
Accessibility and Testing
NativeBase provides a strong foundation for accessibility. It’s crucial to build upon this by:
- Using Semantic Components: Prefer
Headingover a styledTextcomponent for titles. Use components likePressableorButtonfor interactive elements. - Providing Labels: Always add `accessibilityLabel` props to icons and buttons that don’t have descriptive text.
When it comes to testing, the Ignite boilerplate already has you covered with a setup for Jest News and React Testing Library News. Since NativeBase components render down to standard React Native primitives, you can test them just like any other component. For end-to-end testing, tools like Detox News integrate well with this stack.
State Management Integration
While this article focuses on the UI layer, it’s worth noting how seamlessly this setup integrates with state management. Ignite uses MobX-State-Tree, but the principle is the same for other libraries discussed in Recoil News or Jotai News. Your components can react to state changes from your store, and data-fetching libraries like those in React Query News or Apollo Client News can be used to pass data down to your NativeBase components as props.
Conclusion
The modern React Native landscape is all about building smarter, not harder. By strategically combining a feature-rich UI library like NativeBase with a robust application boilerplate like Ignite, you create a development environment optimized for speed, consistency, and scalability. This approach allows you to bypass the time-consuming initial setup and architectural debates, empowering you to focus directly on delivering value to your users. You get a well-structured, testable, and maintainable codebase from day one, paired with a powerful, themeable design system that ensures a polished user experience across all platforms. As you embark on your next React Native project, consider this powerful duo. It’s a proven strategy for building high-quality, production-ready mobile applications efficiently and effectively, keeping you ahead in the ever-evolving world of React News and mobile development.


